1.3 胶水代码初探
打开上一节(1.2)中由Emscripten生成的JavaScript胶水代码hello.js,我们可以发现,大多数的操作,都围绕全局对象Module展开,而该对象正是Emscripten程序运行时的核心所在。
tips 跳过1.3.1以及1.3.2不会影响后续章节的阅读。但如果您对Emscripten模块载入等细节感兴趣,本节内容将有助于理解胶水代码的结构。随着Emscripten的版本升级,其生成的胶水代码有可能发生变化,本节展示的代码均基于Emscripten 1.38.11。
1.3.1 WebAssembly汇编模块载入
WebAssembly汇编模块(既.wasm文件)的载入是在doNativeWasm函数中完成的。其核心部分如下:
    function instantiateArrayBuffer(receiver) {
      getBinaryPromise().then(function(binary) {
        return WebAssembly.instantiate(binary, info);
      }).then(receiver).catch(function(reason) {
        err('failed to asynchronously prepare wasm: ' + reason);
        abort(reason);
      });
    }
    // Prefer streaming instantiation if available.
    if (!Module['wasmBinary'] &&
        typeof WebAssembly.instantiateStreaming === 'function' &&
        !isDataURI(wasmBinaryFile) &&
        typeof fetch === 'function') {
      WebAssembly.instantiateStreaming(fetch(wasmBinaryFile, { credentials: 'same-origin' }), info)
        .then(receiveInstantiatedSource)
        .catch(function(reason) {
          // We expect the most common failure cause to be a bad MIME type for the binary,
          // in which case falling back to ArrayBuffer instantiation should work.
          err('wasm streaming compile failed: ' + reason);
          err('falling back to ArrayBuffer instantiation');
          instantiateArrayBuffer(receiveInstantiatedSource);
        });
    } else {
      instantiateArrayBuffer(receiveInstantiatedSource);
    }
这一堆让人眼花缭乱的代码其实只干了这几件事:
- 尝试使用
WebAssembly.instantiateStreaming()方法创建wasm模块的实例; - 如果流式创建失败,则改用
WebAssembly.instantiate()方法创建实例; - 成功实例化后的返回值交由
receiveInstantiatedSource()方法处理。
receiveInstantiatedSource()相关代码如下:
    function receiveInstance(instance, module) {
      exports = instance.exports;
      if (exports.memory) mergeMemory(exports.memory);
      Module['asm'] = exports;
      Module["usingWasm"] = true;
      removeRunDependency('wasm-instantiate');
    }

    ......

    function receiveInstantiatedSource(output) {
      // 'output' is a WebAssemblyInstantiatedSource object which has both the module and instance.
      // receiveInstance() will swap in the exports (to Module.asm) so they can be called
      assert(Module === trueModule, 'the Module object should not be replaced during async compilation - perhaps the order of HTML elements is wrong?');
      trueModule = null;
      receiveInstance(output['instance'], output['module']);
    }
receiveInstantiatedSource()方法调用了receiveInstance()方法,后者的这条指令:
Module['asm'] = exports;
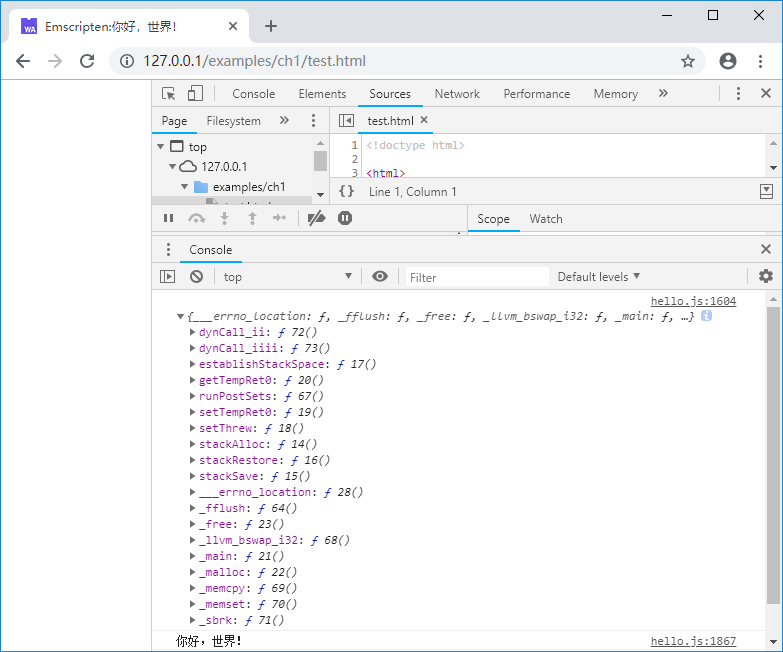
将wasm模块实例的导出对象传给了Module的子对象asm。倘若我们在上述函数中手动添加打印实例导出对象的代码:
    function receiveInstance(instance, module) {
      ... ...
      Module['asm'] = exports;
      console.log(Module['asm']);  //print instance.exports
      ... ...
浏览器控制台将输出:
由此可见,上述一系列代码运行后,Module['asm']中保存了WebAssembly实例的导出对象——而导出函数恰是WebAssembly实例供外部调用最主要的入口。
1.3.2 导出函数封装
为了方便调用,Emscripten为C/C++中导出的函数提供了封装,在hello.js中,我们可以找到大量这样的封装代码:
... ...
var _main = Module["_main"] = function() {
  assert(runtimeInitialized, 'you need to wait for the runtime to be ready (e.g. wait for main() to be called)');
  assert(!runtimeExited, 'the runtime was exited (use NO_EXIT_RUNTIME to keep it alive after main() exits)');
  return Module["asm"]["_main"].apply(null, arguments) };
var _malloc = Module["_malloc"] = function() {
  assert(runtimeInitialized, 'you need to wait for the runtime to be ready (e.g. wait for main() to be called)');
  assert(!runtimeExited, 'the runtime was exited (use NO_EXIT_RUNTIME to keep it alive after main() exits)');
  return Module["asm"]["_malloc"].apply(null, arguments) };
... ...
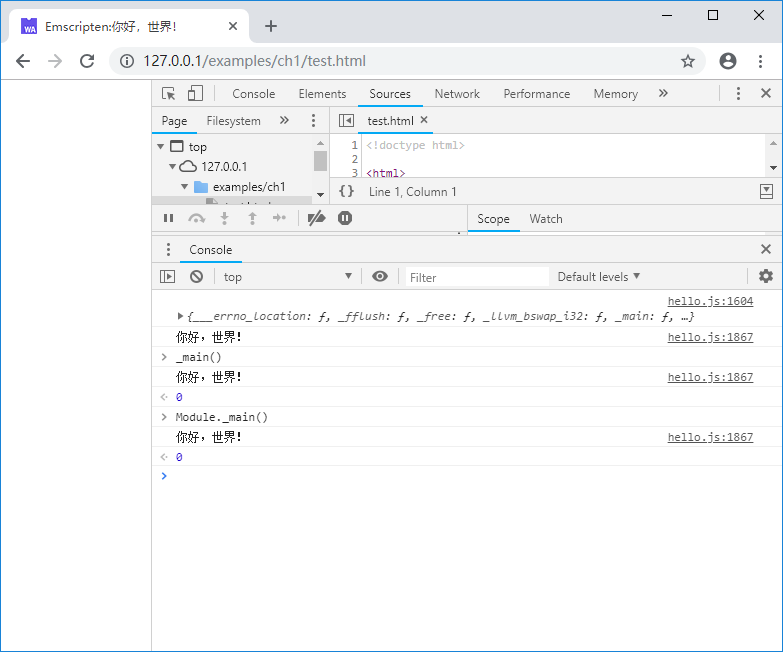
在Emscripten中,C函数导出时,函数名前会添加下划线“_”,由此可知上述代码分别提供了main()以及malloc()函数的封装;而var _main以及Module._main对应的,都是hello.cc中的main()函数。我们可以在浏览器控制台中手动执行_main()以及Module._main()对此进行检验:
不出所料,二者都执行了C代码中的main()函数,输出了“你好,世界!”。
1.3.3 异步加载
WebAssembly实例是通过WebAssembly.instantiateStreaming()/WebAssembly.instantiate()方法创建的,而这两个方法均为异步调用,这意味着.js文件加载完成时Emscripten的Runtime并未准备就绪。倘若我们修改test.html,载入.js后立即执行Module._main():
  <body>
    <script src="hello.js"></script>
    <script>
      Module._main();
    </script>
  </body>
控制台将输出以下错误信息:
Assertion failed: you need to wait for the runtime to be ready (e.g. wait for main() to be called)
解决这一问题需要建立一种Runtime准备就绪时的通知机制,为此Emscripten提供了多种解决方案,最简单的方法是在main()函数中发出通知,但是对多数纯功能性的模块来说,main()函数并不是必须的,因此笔者较常使用方法的是不依赖于main()函数的onRuntimeInitialized回调,该方法的例子如下:
  <body>
    <script>
      Module = {};
      Module.onRuntimeInitialized = function() {
        //do sth.
        Module._main();
      }
    </script>
    <script src="hello.js"></script>
  </body>
其基本思路是在Module初始化前,向Module中注入一个名为onRuntimeInitialized的方法,Emscripten的Runtime就绪后,将会回调该方法。在hello.js中,我们可以观察到该回调的调用过程:
function run(args) {
  ... ...
    ensureInitRuntime();

    preMain();

    if (Module['onRuntimeInitialized']) Module['onRuntimeInitialized']();

    if (Module['_main'] && shouldRunNow) Module['callMain'](args);

    postRun();
  ... ...
}
tips 本书例子代码中,将大量使用
onRuntimeInitialized回调方法作为测试函数入口。

