為可穿戴設備創建Notification
編寫:wangyachen - 原文: http://developer.android.com/training/wearables/notifications/creating.html
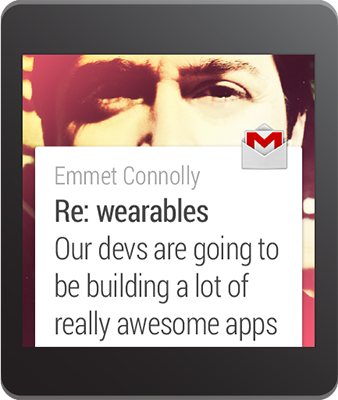
使用 NotificationCompat.Builder 來創建可以發送給可穿戴設備的手持設備Notification。當我們使用這個類創建Notification之後,無論Notification出現在手持式設備上還是可穿戴設備上,系統都會把Notification正確地顯示出來。
**Note:**使用 RemoteViews 的Notification會剝除自定義的 layout,並且可穿戴設備上只顯示文本和圖標。但是,通過創建一個運行在可穿戴設備上的應用,開發者能夠使用自定義的卡片佈局創建自定義Notifications。
Import必要的類
為了引入必要的包,在我們的 build.gradle 文件中加入如下內容:
compile "com.android.support:support-v4:20.0.+"
現在我們的項目能夠訪問關鍵的包,接下來從support library中引入必要的類:
import android.support.v4.app.NotificationCompat;
import android.support.v4.app.NotificationManagerCompat;
import android.support.v4.app.NotificationCompat.WearableExtender;
通過Notification Builder創建Notification
v4 support library能夠讓開發者使用最新的特性去創建 Notification,諸如action 按鈕和大的圖標,而且兼容Android1.6(API level4)及以上的版本。
為了通過support library創建一個Notification,我們需要創建一個 NotificationCompat.Builder 的實例,然後通過將該實例傳給 notify() 來發出 Notification。例如:
int notificationId = 001;
// Build intent for notification content
Intent viewIntent = new Intent(this, ViewEventActivity.class);
viewIntent.putExtra(EXTRA_EVENT_ID, eventId);
PendingIntent viewPendingIntent =
        PendingIntent.getActivity(this, 0, viewIntent, 0);

NotificationCompat.Builder notificationBuilder =
        new NotificationCompat.Builder(this)
        .setSmallIcon(R.drawable.ic_event)
        .setContentTitle(eventTitle)
        .setContentText(eventLocation)
        .setContentIntent(viewPendingIntent);

// Get an instance of the NotificationManager service
NotificationManagerCompat notificationManager =
        NotificationManagerCompat.from(this);

// Build the notification and issues it with notification manager.
notificationManager.notify(notificationId, notificationBuilder.build());
當該Notification出現在手持設備上時,用戶能夠通過觸摸Notification來觸發之前通過[setContentIntent()](http://developer.android.com/reference/android/support/v4/app/NotificationCompat.Builder.html#setContentIntent(android.app.PendingIntent)設置的PendingIntent。當該Notification出現在可穿戴設備上時,用戶能夠通過向左滑動該Notification顯示Open的action,點擊這個action能夠激活手持設備上的Intent。
添加Action按鈕
除了通過 setContentIntent() 定義的主要內容action之外,我們還可以通過傳遞一個 PendingIntent 給 addAction() 來添加其它action。
例如,下面的代碼展示了創建一個同之前相仿的Notification,只不過添加了一個在地圖上查看事件位置的action。
// Build an intent for an action to view a map
Intent mapIntent = new Intent(Intent.ACTION_VIEW);
Uri geoUri = Uri.parse("geo:0,0?q=" + Uri.encode(location));
mapIntent.setData(geoUri);
PendingIntent mapPendingIntent =
        PendingIntent.getActivity(this, 0, mapIntent, 0);

NotificationCompat.Builder notificationBuilder =
        new NotificationCompat.Builder(this)
        .setSmallIcon(R.drawable.ic_event)
        .setContentTitle(eventTitle)
        .setContentText(eventLocation)
        .setContentIntent(viewPendingIntent)
        .addAction(R.drawable.ic_map,
                getString(R.string.map), mapPendingIntent);
在手持設備上,action表現為在Notification上附加的一個額外按鈕。而在可穿戴設備上,action表現為Notification左滑後出現的大按鈕。當用戶點擊action時,能夠觸發手持設備上對應的intent。
**Tip:**如果我們的Notification包含了一個"回覆"的action(例如短信類app),我們可以通過支持直接從Android可穿戴設備返回的語音輸入,來加強該功能的體驗。更多信息,詳見在Notification中接收語音輸入。
可穿戴式獨有的 Actions
如果開發者想要可穿戴式設備上的action與手持式設備不一樣的話,可以使用 WearableExtender.addAction(),一旦我們通過這種方式添加了action,可穿戴式設備便不會顯示任何其他通過 NotificationCompat.Builder.addAction() 添加的action。這是因為,只有通過 WearableExtender.addAction() 添加的action才能只在可穿戴設備上顯示且不在手持式設備上顯示。
// Create an intent for the reply action
Intent actionIntent = new Intent(this, ActionActivity.class);
PendingIntent actionPendingIntent =
        PendingIntent.getActivity(this, 0, actionIntent,
                PendingIntent.FLAG_UPDATE_CURRENT);

// Create the action
NotificationCompat.Action action =
        new NotificationCompat.Action.Builder(R.drawable.ic_action,
                getString(R.string.label, actionPendingIntent))
                .build();

// Build the notification and add the action via WearableExtender
Notification notification =
        new NotificationCompat.Builder(mContext)
                .setSmallIcon(R.drawable.ic_message)
                .setContentTitle(getString(R.string.title))
                .setContentText(getString(R.string.content))
                .extend(new WearableExtender().addAction(action))
                .build();
添加一個Big View
開發者可以在Notification中通過添加某種"big view"風格來插入擴展文本。在手持式設備上,用戶能夠通過展開Notification看見big view的內容。在可穿戴式設備上,big view內容是默認可見的。
可以通過 NotificationCompat.Builder 對象調用 setStyle(),並設置參數為 BigTextStyle 或 InboxStyle 的實例,從而將擴展內容添加到 Notification 中。
比如,下面的代碼為事件 Notification 添加了一個 NotificationCompat.BigTextStyle 的實例,目的是為了包含完整的事件描述(這能夠包含比 setContentText() 提供的空間所能容納的字數更多的文字)。
// Specify the 'big view' content to display the long
// event description that may not fit the normal content text.
BigTextStyle bigStyle = new NotificationCompat.BigTextStyle();
bigStyle.bigText(eventDescription);

NotificationCompat.Builder notificationBuilder =
        new NotificationCompat.Builder(this)
        .setSmallIcon(R.drawable.ic_event)
        .setLargeIcon(BitmapFractory.decodeResource(
                getResources(), R.drawable.notif_background))
        .setContentTitle(eventTitle)
        .setContentText(eventLocation)
        .setContentIntent(viewPendingIntent)
        .addAction(R.drawable.ic_map,
                getString(R.string.map), mapPendingIntent)
        .setStyle(bigStyle);
要注意的是,開發者可以通過 setLargeIcon() 方法為任何 Notification 添加一個大圖標。但是,這些圖標在可穿戴設備上會顯示成大的背景圖片,並且由於這些圖標會被放大以適應可穿戴設備的屏幕,導致這些圖標顯示的效果不好。想要為 Notification 添加一個可穿戴設備適用的背景圖片,請看下面一小節為 Notification 添加可穿戴式特性。更多關於大圖片在 Notification 上的設計,詳見 Design Principles of Android Wear。
##為Notification添加可穿戴式特性
如果我們需要為 Notification 添加一些可穿戴式的特性設置,比如制定額外的內容頁,或者讓用戶通過語音輸入一些文字,那麼我們可以使用 NotificationCompat.WearableExtender 來制定這些設置。為了適用這個 API,我們需要:
- 創建一個 WearableExtender 的實例,為 Notification 設置可穿戴設備獨有的特性。
- 創建一個 NotificationCompat.Builder 的實例,就像本課程先前所說的,設置需要的 Notification 屬性。
- 調用 Notification 上的 extend() 並將 WearableExtender 傳進該方法。這在 Notification 上應用了可穿戴設備的選項。
- 調用 build() 去構建一個 Notification。
例如,以下代碼調用 setHintHideIcon() 方法把應用的圖標從 Notification 卡片上刪掉。
// Create a WearableExtender to add functionality for wearables
NotificationCompat.WearableExtender wearableExtender =
        new NotificationCompat.WearableExtender()
        .setHintHideIcon(true)
        .setBackground(mBitmap);

// Create a NotificationCompat.Builder to build a standard notification
// then extend it with the WearableExtender
Notification notif = new NotificationCompat.Builder(mContext)
        .setContentTitle("New mail from " + sender)
        .setContentText(subject)
        .setSmallIcon(R.drawable.new_mail)
        .extend(wearableExtender)
        .build();
setHintHideIcon() 和 setBackground() 這兩個方法是 NotificationCompat.WearableExtender 可用的新 Noticication 特性的兩個例子。
Note:setBackground() 中使用的位圖在不滾動的背景下應該是 400x400 的分辨率,在支持視差滾動的背景下應該是 640x640。將這些位圖放在
res/drawable-nodpi目錄下。將可穿戴 Notification 中使用的其它不是位圖的資源放到res/drawable-hdpi目錄,例如 setContentIcon() 用到的那些資源。
如果開發者需要稍後去讀取可穿戴特性的設置,可以使用設置相應的get方法,該例子通過調用 getHintHideIcon() 去獲取當前 Notification 是否隱藏了圖標。
NotificationCompat.WearableExtender wearableExtender =
        new NotificationCompat.WearableExtender(notif);
boolean hintHideIcon = wearableExtender.getHintHideIcon();
傳遞 Notification
如果開發者想要傳遞自己的 Notification,請使用 NotificationManagerCompat 的API代替 NotificationManager:
// Get an instance of the NotificationManager service
NotificationManagerCompat notificationManager =
        NotificationManagerCompat.from(mContext);

// Issue the notification with notification manager.
notificationManager.notify(notificationId, notif);
如果開發者使用了framework中的 NotificationManager ,那麼 NotificationCompat.WearableExtender 中的一些特性就會失效,所以,請確保使用 NotificationManagerCompat。

